6 Essential Tips Before Setting Up Your Switch 2
▼ Summary
– The Nintendo Switch 2 setup process involves multiple steps, including signing into your Nintendo Account and enabling the “remember me” option to avoid repeated logins.
– System Transfer from an old Switch to the Switch 2 requires both consoles to be connected to AC power and in close proximity, with the transfer only possible during initial setup.
– If System Transfer isn’t an option, users can unlink their old Switch via Nintendo’s website to access their digital games on the new console.
– The Switch 2 supports either 4K at 60Hz or 1080p/1440p at 120Hz, but not both simultaneously, with few games currently utilizing 120Hz.
– The Switch Online app’s Auto Upload feature for screenshots must be manually enabled, and only the new Joy-Cons can physically attach to the Switch 2, though older controllers work wirelessly or via USB with settings adjustments.
Setting up your new Switch 2 should be exciting, not frustrating. After waiting in line, securing your pre-order, and finally unboxing your console, the last thing you want is to hit unexpected snags during setup. While the Switch 2 delivers incredible gaming experiences right out of the gate, a few key steps can ensure everything runs smoothly from the start.
First, let your Switch remember you. During initial setup, you’ll sign into your Nintendo Account multiple times. While the QR code login option is handy, don’t overlook the small but crucial “Remember Me” button on the Switch screen. Tapping this saves you from repeated sign-ins later, especially when accessing the eShop.
Transferring data? Do it immediately. If you’re upgrading from an older Switch, resist the urge to dive straight into gaming. The system transfer process requires both consoles to be plugged into power-generic USB-C chargers won’t cut it. Use the official Switch 2 charger, keep the devices close, and complete the transfer before docking. Skipping this step means factory-resetting later if you change your mind.
No old Switch? Unlink manually. If your previous console is unavailable, visit Nintendo’s account website. Under “Game Systems,” unlink your old device to reassociate your digital library with the Switch 2. Otherwise, purchases remain tied to the original hardware, a quirk unique to Nintendo’s ecosystem.
Resolution vs. refresh rate: choose wisely. The Switch 2 supports 4K at 60Hz or 1080p/1440p at 120Hz, but not both simultaneously. Currently, few games leverage 120Hz, so most players won’t miss it. VRR (variable refresh rate) is another feature limited to handheld mode, so temper expectations if you’re gaming on a high-end TV.
Automate your screenshots. The Switch Online app now offers cloud uploads for captures, but only if you enable Auto Uploads in the Album app’s settings. It’s a small toggle that saves hassle later.
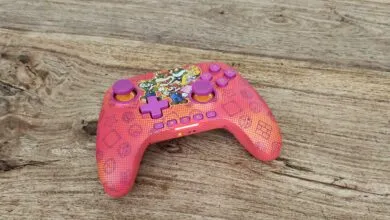
Controller compatibility simplified:
- Only new Joy-Cons attach physically to the Switch 2.
- Original Joy-Cons and Pro Controllers work wirelessly.
- Wired Pro Controller use requires a settings toggle under System Settings.
- Third-party controllers may need firmware updates, check manufacturer sites.
One final note: Your old Pro Controller won’t power on the Switch 2 or your TV, a minor but noticeable omission.
With these tips, you’ll bypass common pitfalls and spend less time troubleshooting, more time gaming. Whether you’re exploring Hyrule or racing in Mario Kart, a smooth setup ensures nothing interrupts the fun.
(Source: KOTAKU)