Arc Raiders: 14 Must-Know Tips for Beginners
▼ Summary
– Arc Raiders is a challenging PvPvE extraction shooter that requires significant time investment and involves unpredictable, costly losses.
– Using the Free Loadout allows players to gear up without risk and trade its Augment for a Looting Augment to efficiently gather resources.
– Players can cancel fall damage by timing a dodge roll upon landing, a crucial mobility skill for survival in the game.
– Rubber Parts are a scarce and essential crafting resource used in many upgrades, found in Mechanical, Industrial, or Technological loot sources.
– The Practice Range is vital for testing weapons and attachments safely, and rebinding the dodge roll key improves accessibility during combat.
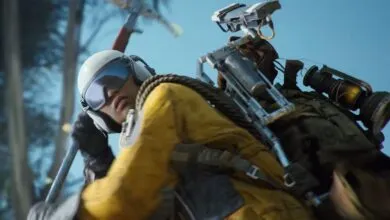
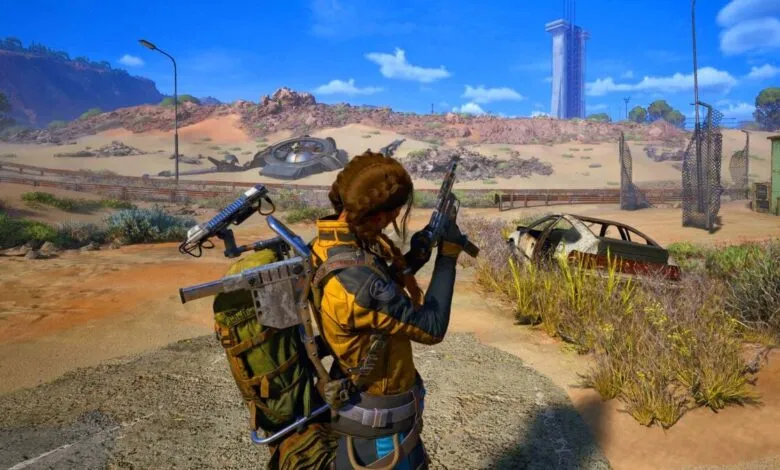
Arc Raiders has quickly established itself as a standout PvPvE extraction shooter, demanding both strategic thinking and quick reflexes from its players. The game presents a steep learning curve where losses can feel punishing, but mastering its systems is incredibly rewarding. After spending considerable time exploring its dangerous world, I’ve compiled essential advice to help newcomers navigate the threats posed by both hostile automatons and rival players.
Never underestimate the value of the Free Loadout option. Before embarking on a mission, you can select a pre-assembled kit containing a primary weapon, ammunition, medical supplies, and various utilities at no cost. This is a fantastic method for getting back into the action without risking your hard-earned personal gear. The only real loss from a failed run is your time. Successfully extracting with this free equipment means you’ve acquired new items without any crafting investment, and you can always dismantle them for components later.
A crucial strategy involves trading your Free Loadout Augment for a Looting Mk. 1 Augment with the trader Lance. This has become a standard recovery tactic for me after an unsuccessful mission. I deploy with the free gear, return to base, and immediately exchange the augment. This either sets me up for a dedicated looting expedition or provides materials for recycling if I’m already well-stocked. Utilizing Free Loadouts is an efficient method for maintaining a steady flow of crafting resources.
Master the technique of rolling to negate fall damage. While the game allows for significant falls, a mistimed jump can still be costly, especially when being chased. Pressing the dodge button the instant your character lands triggers a roll that cancels the impact. The timing requires practice, but a skill in the Mobility tree can make it more forgiving. Be aware that some drops are simply too high to survive, though players have discovered exploits like grabbing ledges to cancel longer falls.
Rubber parts are a consistently scarce and vital crafting component. Throughout my playtime, this particular resource has always been in high demand. This is largely because rubber parts are required for upgrading, building, and repairing numerous weapons and components. You’ll frequently need them alongside metal parts or to craft Mechanical Components. They can be obtained by salvaging items in the field, recycling gear in your inventory, or as a reward from Scrappy after a run. Look for them in Mechanical, Industrial, or Technological loot caches, identifiable on your map by their respective icons. I strongly advise dedicating several runs specifically to gathering rubber parts.
The Practice Range is an indispensable tool for improvement. The initial tutorial provides only a basic introduction. To truly understand your character’s movement and how different weapons handle, especially with various mods, you need a safe space to experiment. The practice range offers a small map where you can test parkour maneuvers and every firearm. You can swap attachments in real time to see their effects; for instance, I discovered my preference for the Muzzle Break over the Compensator through testing here. There are even achievements tied to using four different guns in the range.
For mouse and keyboard users, rebinding your dodge roll is critical. Evading enemy fire is a core survival mechanic, and the default Left Alt key is not optimally placed for quick access while moving. I recommend remapping it to a key you can easily press without taking your fingers off the WASD keys. Using a mouse button is another excellent option. The goal is to ensure you can dodge fluidly during intense combat without awkward hand contortions.
Pay close attention to the audio landscape, as birds and other sounds can reveal your position. The game’s sound design is exceptional and functionally important. While you may already know that running and looting creates noise, you should also be wary of environmental hazards like security cameras and metal detectors. More subtly, flocks of birds will take flight if a player disturbs them, betraying someone’s presence. You can use this to your advantage by listening for spontaneous bird activity, which usually indicates a nearby threat.
Use the emote wheel to coordinate with other players. One emote wheel allows you to ping locations with contextual messages like “group up over there.” By default, these are only heard by your squad, but you can toggle them to be heard by all players in the vicinity. A hidden function of the “group up” emote activates when you look at the ground while selecting it; your character will say “Follow me,” which is incredibly useful for leading a group of random players.
Understand the difference between Salvaging and Recycling. You can break down items in the field via Salvaging or in your inventory after extraction via Recycling. Recycling always yields more resources than Salvaging, so you should generally wait until you’ve safely returned to base before dismantling items, unless you need immediate space or a specific part. Be cautious, as some item descriptions are misleading. An object like a Toaster, described as “Can be recycled into crafting materials,” might also be required for upgrading workshops like the Refiner. Use the tracking feature on workshop upgrade requirements to mark necessary items and avoid accidentally recycling them.
When your inventory is full, your primary objective should be extraction. A session typically lasts around 30 minutes, and lingering with a full bag is a common way to lose everything. Even common parts like metal and rubber are essential for crafting and credits. A bag full of loot, no matter how mundane it seems, represents progress. Dying with it nullifies that progress. A full inventory signals it’s time to head for an extraction point, which is often a dangerous journey in itself. Building a powerful loadout is a process achieved through a series of small, successful victories.
Always plan your route before heading into a mission. I learned this lesson later than I should have. Use a run with a Free Loadout to scout the path to a quest objective or a valuable loot cache. Note the different routes, potential enemy positions, and escape paths. The enemy AI is dynamic and unpredictable, often employing machine-learned behaviors, so they won’t be in the same place every time. A reconnaissance run can reveal deadly threats like Sentinel turrets without you risking your best gear.
Exercise extra caution on the Dam Battlegrounds map. In my experience, this initial area sees more frequent player-versus-player encounters. This is likely because it’s populated by new players learning the game’s mechanics. As players progress and unlock other maps, they often have better gear and are more focused on specific objectives, making them slightly less aggressive. Always be prepared for unexpected confrontations when deploying to the Dam.
You might be surprised by the friendliness of other players. While anyone not in your squad is a potential threat, I’ve found the community to be generally cooperative, especially on maps beyond the Dam. When entering a building where I suspect another player, I often use the emote wheel to broadcast a “Hello” and “Don’t Shoot!” Surprisingly, many random players respond in kind and even holster their weapons. Holstering has become a universal sign of peace in these tense social interactions. Of course, you can always betray that trust, but that path has its own consequences.
Don’t overlook the strategic potential of gadgets. Once I began experimenting with items that seal doors, erect barricades, and set traps, I realized how much control I could exert over the battlefield. I frequently secure buildings with traps while looting or hunting Arc from windows. Gadgets range from harmless noisemakers to non-lethal jolt mines and lethal explosives. Currently, many players aren’t making full use of these tools, allowing you to surprise unsuspecting Raiders with a well-placed trap and secure your position.
Turn the Snitches to your advantage, particularly when playing solo. These drones are typically a nuisance because they summon Arc forces when they spot you. However, you can weaponize them. By shooting at a Snitch from a distance, you can lure it toward your position. This is an effective tactic for escaping pursuing enemy players. The summoned Wasps or Hornets will attack everyone in the vicinity, creating a perfect distraction that can allow you to escape or let the Arc forces eliminate your foes for you.
As the game continues to evolve, more advanced strategies will undoubtedly emerge. For now, these foundational tips will help you deconstruct its complex and challenging gameplay. The journey toward mastery is difficult, but overcoming its unpredictable challenges provides a deeply satisfying experience.
(Source: Kotaku)